


When it comes to installing a ceiling fan, the complicated setup might scare most of us away. Even though it promises powerful airflow, it often comes with the headache of complicated instructions and too many parts.
But a more advanced model like the DREO CLF521 can actually change the game—you can breeze through the process with ease. Unlike traditional fans that require a lengthy assembly, DREO ceiling fans come pre-assembled, making setup faster and stress-free. Let's dive into the simple, 4-step installation!
What You'll Need:
- Ceiling fan kit (includes the ceiling bracket, bracket cover set, ceiling fan body (pre-assembled), blades, light kit and mounting hardware)
- Ladder
- Phillips Screwdriver
- Wire Stripper
DREO Safety Tips:
- Turn off the power: To avoid the risk of electrical shock, ensure the power is disconnected by switching off the circuit breakers to the outlet box connected to the wall switch location.
- Seek professional help: If you're unfamiliar or uncomfortable with wiring, it's best to contact a qualified electrician for assistance.
- Double-check installation: Before use, always confirm that the ceiling fan is securely and properly installed.
Step 1: Set Up Your Ceiling Bracket
Depending on your ceiling setup, you'll need to choose the appropriate method to secure your ceiling bracket:
- For existing fan-rated outlet box: Use machine screws (not provided) to secure the fan. Make sure the box is rated for a fan that weighs up to 35 lbs (15.9 kg) or less.

- For support structure installation: Use wood screws and washers(included). Drill 9/64" pilot holes into the support structure to securely install the ceiling bracket.

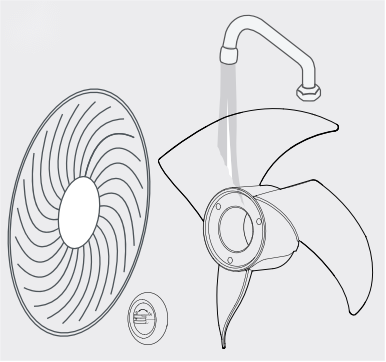
Step 2: Assemble the Blades
Now that your ceiling bracket is ready, it's time to assemble the blades:
- You can choose either the front or back side of the blades—whichever looks best to you!

- Align the two blade slots with the vertical tabs in the ceiling fan body.

- Partially insert screws and washers into the blade's holes, then use a screwdriver to securely tighten them.

Pro tip:
- For optimal performance, make sure to use the fan blades consistently, whether on the front or reverse side.
- Carefully follow the instructions on the blades; improper installation could lead to the fan not functioning correctly.
Step 3: Assemble the Downrod
The downrod is essential for hanging your ceiling fan securely. Follow these steps:
- Remove the pre-installed setscrews and downrod pin.

- Insert the canopy, followed by the yoke cover, and pass all wires to one side of the downrod to keep them untangled.

- Slide the downrod into the yoke of the motor assembly, aligning the holes, re-install the downrod pin and clip.

- Tighten the setscrew with a screwdriver.

- Slide the yoke cover back into place.

Step 4: Hang the Ceiling Fan & Install the Light Kit
- Place the downrod ball into the ceiling bracket and ensure the slot aligns with the inner lock. Rotate the downrod until it clicks securely into place.

- Connect the wires: white (grounded) from the ceiling to white from the fan, black (ungrounded) from the ceiling to black from the fan. Don't forget to connect the green or copper grounding wires!

- Rotate the canopy clockwise to secure it into place—you'll hear a reassuring “click.”

- For the light kit: Connect the matching wires from the fan body to the light kit. Then, rotate the light kit clockwise to secure it into place.

Final Takeaway
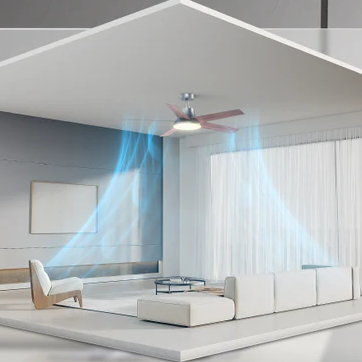
You're all set! Installing a DREO fan is more than just a task—it's the start of a more comfortable, refreshing space. With easy-to-follow steps and a design that makes setup a breeze, you'll feel the difference as soon as the fan starts spinning.
Ready for more? Check out the full range of DREO ceiling fans, where every model brings the same easy installation and unbeatable comfort to your home.